
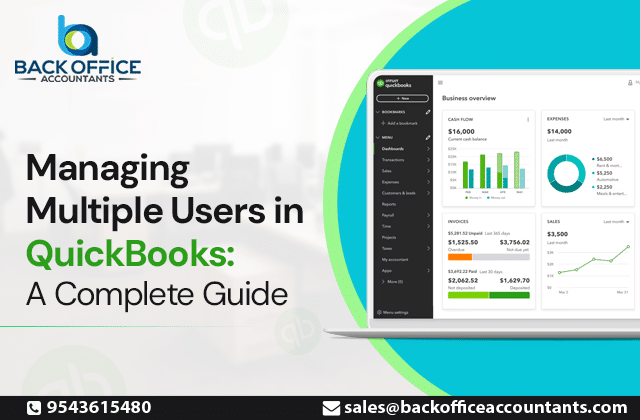
QuickBooks’ multi-user mode unlocks a new level of efficiency, collaboration, and accuracy in accounting. Multiple users working on the same company file simultaneously streamlines processes, reduces errors, and improves team efficiency.
Real-time collaboration ensures centralized data flow with enhanced security, giving peace of mind that no information is lost during migration or transfer. This feature is especially crucial for growing businesses that need additional users to ensure smooth operational workflows.
Unlock Full Potential for QuickBooks with Multi-user Mode:
Yet, despite these benefits, most businesses fail to tap into the full potential of Multi-User Mode in QuickBooks. “Lack of complete awareness, technical issues, cost concerns, data security risks, and workflow inefficiencies—when not set up properly—are some of the reasons businesses hesitate to fully adopt Multi-User Mode in QuickBooks,” according to the experts at Back Office Accountants.
As a remote accounting firm specializing in back-office accounting services, we frequently help businesses unlock QuickBooks’ full potential. It’s surprising how many companies are still unaware of this feature. Those that do know about it often fail to follow best practices, leading to subpar results.
In today’s blog, we’ll guide you through how to enable Multi-User Mode, its benefits, precautions to take, and best practices to maximize its impact in QuickBooks. Let’s directly jump into how-to guide of QuickBooks multi-user mode in Desktop.
How to Setup A Multi-User Network In QuickBooks Desktop?
Multi-User Mode in QuickBooks allows multiple users to access, work on, and collaborate within the same company file simultaneously. Before enabling Multi-User Mode in QuickBooks Desktop, let’s go over a few prerequisites.
“The number of users who can work on the same company file at once depends on the user count associated with the QuickBooks license purchased. Each plan offers a specific number of permitted simultaneous logins, provided all users are on the same network and have valid licenses,” explains our QuickBooks Expert at Back Office Accountants. With the correct licenses and permissions, you can download QuickBooks Desktop and follow these steps:
Step 1: Install QuickBooks Desktop
- To begin, you will need to download QuickBooks Desktop. After downloading, save the installation file to your computer.
- During installation, follow the prompts and select the option for custom and network installation. At a certain point, you will be asked if you intend to use QuickBooks on the current system or if it will be hosted on a server. Make your choice based on your needs.
Step 2: Enable Multi-User Hosting
- Once QuickBooks is installed, open the program. If your company file requires an update to the latest version, ensure you complete that process before proceeding.
- After that, go to the top-left corner, click the Filemenu, and navigate to Utilities, where you will find an option to enable Host Multi-User Access. If you have already enabled multi-user hosting in the past, you can skip this part.
Step 3: Configure Firewall and Security Settings
- To ensure QuickBooks operates smoothly in multi-user mode, you need to configure the firewall. Open the Start menu and access the Windows Firewall settings. From there, select the option for advanced settings. In the advanced settings section, look for Inbound Rules, and create new rules.
- When prompted, choose Port, and then input the necessary port numbers associated with your version of QuickBooks. Allow the connection, and register profiles as needed. Give the rule a name to finalize the setup. After these steps, open QuickBooks in multi-user mode to continue.
Step 4: Set Folder Permissions for File Sharing
- Locate the folder that contains your company file and right-click on it. Select Properties, then go to the Securitytab and click Edit.
- In the list that appears, find QBDataServicesUserXX, where “XX” represents the version of QuickBooks you are using. Grant full control by selecting Allow.
- Click Applyand then OK to confirm. Once this is done, proceed with setting up permissions for file sharing across your network.
- If you are using Windows 10, Windows 8, or Windows 7, press the Windows + Rkeys simultaneously to open the file explorer.
- Navigate to the folder where your company files are stored, right-click, and select Properties. In the Sharingtab, click Share, then choose the correct user associated with your QuickBooks version, and ensure the permissions are set correctly.
Step 5: Install and Update Database Server Manager
- To enable multi-user mode, you need to install and update the Database Server Manager on the computer that will host the company files. This tool is included with the QuickBooks Desktop installation.
- After downloading QuickBooks, the server manager will automatically update. Ensure that this tool has permission to run on the server computer, and scan the company files so they can be accessed from other computers on the network.
Step 6: Assign Admin Rights for Multi-User Access
- For users on Windows 10, go to Settings, open the Accountssection, and select the option to add another user to this computer.
- Choose the option to create a user without a Microsoft account. Assign a name and password to the account, and provide administrative rights by selecting the account type as Administrator.
- If you are using Windows 8 or Windows 7, press Ctrl + Rto open the Control Panel, and navigate to the Manage Another Account From there, create a new account, provide a username, and ensure that the role of the account is set to Administrator.
Step 7: Open and Access the Company File Remotely
- Open QuickBooks and go to the File Select the option to switch to Multi-User Mode. In the Multi-User Hosting Setup window, confirm by selecting Yes.
- Afterward, click OKwhen the Multi-User Setup Data window appears. To add users, access the company file, and go to the Set Up Users and Passwords Follow the prompts to add each user individually.
How to Use QuickBooks in Multi-User Mode
- To ensure proper functionality in multi-user mode, begin by setting folder permissions. Right-click on the folder that holds your company file, select Properties, navigate to the Securitytab, and click Edit.
- Locate QBDataServiceUserXX, grant full control, and confirm by clicking Applyand OK.
- Next, configure sharing permissions by opening File Explorer with the Windows + Ekey combination.
- Right-click the folder with your company file, go to Properties, and navigate to the Sharing Ensure the correct user is selected, and set the permission level to full control. This will allow all users to access and work with the company files from their respective workstations.
Best Practices for Multi-User Mode in QuickBooks:
The multi-user mode in QuickBooks enables seamless collaboration, ensuring efficient and streamlined financial management. When done correctly, the QuickBooks multi-user mode enhances workflows, saves time, and boosts the overall productivity of the entire process. But how can you implement it effectively?
Let’s look at the best practices for QuickBooks Desktop:
Regular Company File Backups: Perform regular backups of your company files to safeguard data. Schedule automatic backups for quick recovery in case of any issues.
Control Access to Sensitive Data: Enforce strict user permissions, granting access only to the necessary data. Encourage clear communication to avoid any potential mishaps.
Monitor Performance Regularly: Multi-user access heavily relies on the network and system performance. During peak times, your network or system may experience slowdowns. As our experts at Back Office Accountant recommend, it’s essential to regularly monitor performance to ensure optimal efficiency at all times.
Train Users on Features: Adequate training is often lacking in many resources handling QuickBooks. Not just for multi-user access, but a solid understanding of best practices and features is essential to fully leverage the benefits of QuickBooks.
While cost considerations can be a major hurdle for most growing businesses, practical challenges like system upgrades, network issues, and technical difficulties can also limit a business’s ability to fully utilize QuickBooks. If you’re looking to get the most value out of QuickBooks without facing these challenges, consider outsourcing to professionals like us at Back Office Accountants.
At Back Office Accountant, we specialize in delivering exceptional remote accounting support. With our advanced QuickBooks subscription and expertise, we help global clients achieve their accounting goals. If you’re in need of support for your accounting department, feel free to contact us here.


